Floor scrapers are indispensable tools for removing old flooring materials, adhesive residues, and stubborn debris from various surfaces. Whether you’re renovating your home, preparing a surface for new flooring installation, or tackling a commercial project, knowing how to effectively use a floor scraper is key to achieving professional results. In this guide, we’ll walk you through the step-by-step process of using a floor scraper like a seasoned pro.
Step 1: Choose the Right Floor Scraper
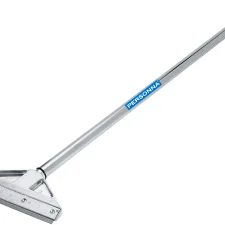
Before you begin, ensure you have the appropriate floor scraper for the job. Floor scrapers come in various types, including handheld scrapers, long-handled scrapers, and powered scraper machines. Consider the size of the project, the type of material you’re removing, and your own comfort and preferences when selecting a floor scraper.
Step 2: Prepare the Work Area
Clear the area of any obstacles, furniture, or debris that may obstruct your movement. If working indoors, ensure proper ventilation to minimize exposure to dust and fumes. Additionally, if you’re removing flooring materials such as tiles or linoleum, protect adjacent surfaces and fixtures from potential damage.
Step 3: Wear Protective Gear
Safety should always be a top priority when using a floor scraper. Wear appropriate personal protective equipment (PPE) such as safety goggles, gloves, a dust mask, and sturdy footwear to prevent injuries from sharp debris, flying particles, and chemical exposure.
Step 4: Begin Scraping
Position yourself comfortably near the edge of the area you intend to start scraping. Hold the floor scraper firmly with both hands, maintaining a stable stance. For handheld scrapers, apply downward pressure while pushing the blade against the surface at a slight angle. For long-handled scrapers or powered scraper machines, follow the manufacturer’s instructions for operating the equipment effectively.
Step 5: Work in Sections
Divide the work area into manageable sections to facilitate thorough and efficient scraping. Start from one corner and work your way across the surface, gradually moving forward as you complete each section. Use a combination of short, controlled strokes and longer passes to effectively loosen and remove the flooring material or residue.
Step 6: Adjust Pressure as Needed
The amount of pressure applied depends on the type of material being removed and the condition of the surface underneath. Adjust the pressure accordingly to avoid damaging the substrate while ensuring efficient removal of the flooring material. Experiment with different pressure levels until you find the optimal balance between effectiveness and surface protection.
Step 7: Remove Debris
Periodically stop scraping to clear away debris and accumulated residue from the scraper blade and work area. Use a broom, vacuum cleaner, or dustpan to collect the debris and dispose of it properly. Keeping the work area clean not only enhances visibility and maneuverability but also prevents debris from interfering with the scraping process.
Step 8: Repeat and Refine
Continue scraping and refining each section until the entire area is thoroughly cleaned and prepped for the next step, whether it’s installing new flooring or applying surface treatments. Take breaks as needed to rest and rehydrate, especially during extended scraping sessions, to maintain focus and avoid fatigue. vist how to use a floor scraper
Step 9: Clean and Maintain the Scraper
After completing the scraping process, clean the scraper blade thoroughly to remove any remaining residue and prevent corrosion. Depending on the type of scraper used, you may need to disassemble and clean the components according to the manufacturer’s instructions. Proper maintenance ensures optimal performance and prolongs the lifespan of your floor scraper.
Step 10: Safety First
Once you’ve finished using the floor scraper, store it safely in a designated area away from children and unauthorized users. Always follow safety guidelines and precautions outlined in the tool’s user manual to prevent accidents and injuries.
By following these steps and practicing proper technique, you can harness the full potential of a floor scraper to achieve professional-quality results in your flooring projects. Remember to prioritize safety, take breaks when needed, and approach each scraping task with patience and precision. With dedication and attention to detail, you’ll become proficient in using a floor scraper like a seasoned expert.