The Ultimate Guide to Finding the Best Buyers Agent in Brisbane


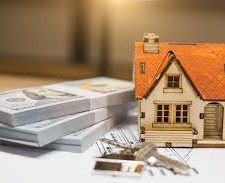
Are you on the hunt for the best buyers agent in Brisbane? Look no further! In this comprehensive guide, we will walk you through the essential steps to help you find the perfect buyers agent who will not only meet but exceed your expectations. So, let’s dive right in and discover how you can make the home-buying process a breeze. Looking for the best buyers agent Brisbane? Your search ends here!

Buyer's Agent: Four things to Know before First Meeting - Patricia Williamson Properties

Why You Need a Buyers Agent in Brisbane

Before we delve into the details, let’s address the crucial question: Why do you need a buyers agent in Brisbane? The answer is simple – they are your key to unlocking the doors of your dream home. Here’s why:

Expertise in the Brisbane Market

Brisbane’s real estate market can be a maze of options and opportunities. A skilled buyers agent knows this market like the back of their hand. They can provide you with insights on the best neighborhoods, upcoming developments, and properties that align with your preferences and budget.

Save Time and Effort

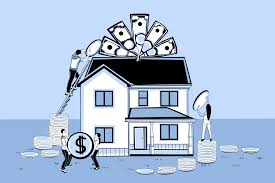
Searching for a property is a time-consuming process. From scouring listings to attending open houses, it can quickly become overwhelming. A buyers agent takes the burden off your shoulders by identifying suitable options and scheduling viewings, saving you precious time and effort.

Negotiation Power

When it comes to negotiations, having an experienced buyers agent in your corner can make all the difference. They are skilled negotiators who can secure the best possible deal for you, ensuring you get value for your money.

Access to Exclusive Listings

Many properties in Brisbane are never listed publicly. Buyers agents have access to these off-market listings, giving you a significant advantage in finding unique and desirable homes.

How to Choose the Best Buyers Agent

Now that you understand the importance of a buyers agent, let’s explore how to choose the best one for your needs:

1. Research Extensively

Start by researching buyers agents in Brisbane. Look for those with a proven track record, excellent client reviews, and a deep understanding of the local market.

2. Interview Multiple Agents

Don’t settle for the first buyers agent you find. Interview at least three agents to assess their communication skills, knowledge, and compatibility with your requirements.

3. Check References

Request references from past clients to gain insights into the agent’s performance. Were they satisfied with the service provided? Did the agent help them find their ideal property?

4. Discuss Fees

Ensure you are clear on the agent’s fee structure from the beginning. Understand how and when they expect to be compensated for their services.

5. Communication is Key

Effective communication is vital in this partnership. Choose an agent who listens to your needs and provides prompt and transparent updates throughout the process.

Wrapping Up

In conclusion, finding the best buyers agent in Brisbane can significantly simplify your home-buying journey. Their expertise, negotiation skills, and access to exclusive listings can make your dream home a reality.

So, if you’re ready to embark on this exciting adventure, start your search for the perfect buyers agent today. With the right professional by your side, you’ll be unlocking the doors to your new Brisbane home in no time.

Furniture Care and Maintenance: Keeping Your Investment in Prime Condition


In the fast-paced world of interior design and home decor, furniture is not just a functional necessity; it’s an expression of your style and personality. Whether you’ve invested in classic pieces or modern designs, taking proper care of your furniture is essential to ensure it stays in prime condition for years to come. Looking for the latest in modern home furnishings and decor? Visit the furniture store paramus your go-to destination for contemporary and stylish pieces. In this comprehensive guide, we will explore the best practices for furniture care and maintenance, helping you protect your investment and keep your living spaces looking their best.

Understanding the Importance of Furniture Maintenance

Furniture is a significant investment for any household, and neglecting its care can lead to premature wear and tear. Regular maintenance not only extends the lifespan of your furniture but also maintains its aesthetic appeal. Here are some key reasons why furniture maintenance should be a top priority:

1. Preservation of Aesthetics

Well-maintained furniture adds beauty and charm to your home. Regular cleaning and care prevent stains, scratches, and other damages that can mar its appearance. By preserving its aesthetics, you can enjoy your furniture’s elegance for years to come.

2. Prolonged Lifespan

Furniture is built to last, but it’s not invincible. Proper maintenance, including cleaning, polishing, and repairs, can significantly extend its lifespan. This means you won’t need to replace your beloved pieces prematurely.

3. Cost Savings

Replacing furniture can be costly. By investing time in maintenance, you save money in the long run. Plus, you can avoid the hassle of shopping for new furniture and disposing of old pieces.

Standard Sizes for Various Types of Furniture

Essential Furniture Care Tips

Now that we understand the importance of furniture maintenance, let’s delve into practical tips to keep your furniture looking and performing at its best.

1. Regular Dusting

Dust is the enemy of furniture. Use a soft, microfiber cloth to dust your furniture regularly. This simple step prevents dust buildup, which can lead to scratches and a dull appearance.

2. Avoid Direct Sunlight

Direct sunlight can fade and damage wood, upholstery, and other materials. Position your furniture away from windows or use curtains and blinds to block harsh UV rays.

3. Proper Cleaning

Different materials require different cleaning methods. Here’s a quick guide:

Wood: Use a mild wood cleaner and a soft cloth to clean wood surfaces. Polish occasionally to maintain its shine.

Upholstery: Vacuum regularly and spot clean with a fabric-appropriate cleaner. Consider professional cleaning for deep stains.

Leather: Wipe with a damp cloth and use a leather conditioner to prevent cracking and maintain suppleness.

Metal: Clean with a damp cloth and mild detergent, and polish to prevent rust.

4. Use Furniture Protectors

Consider using furniture protectors like coasters, placemats, and furniture pads to prevent scratches, water rings, and heat damage.

5. Handle with Care

Be gentle when using your furniture. Avoid dragging or dropping items on it, and use caution when moving furniture to prevent structural damage.

6. Professional Maintenance

For valuable or antique pieces, consult professionals for periodic maintenance. They can address issues like loose joints, broken springs, or refinishing.

PeraDesign
695 NJ-17, paramus , nj, 07652
2014474700

Seasonal Furniture Care Routine

To maintain your furniture’s longevity, it’s essential to establish a seasonal care routine:

Spring

Deep clean upholstery and carpets.

Inspect furniture for any damages.

Polish and wax wood surfaces.

Reapply leather conditioner if necessary.

Summer

Keep furniture out of direct sunlight.

Use a dehumidifier to prevent moisture damage in humid climates.

Fall

Check for pests like termites and take preventive measures.

Inspect and tighten any loose hardware.

Winter

Keep furniture away from heating vents to prevent drying and cracking.

Consider using a humidifier to prevent wood from becoming too dry.

Conclusion

Your furniture is an investment that deserves care and attention. By following these comprehensive guidelines for furniture care and maintenance, you can ensure your pieces remain in prime condition for generations to come. Don’t forget, proper care not only enhances aesthetics but also saves you money in the long run. So, make furniture maintenance a part of your regular household routine, and enjoy the beauty and comfort of your well-preserved furnishings.

Experience the Art of Window Cleaning


When it comes to maintaining the cleanliness and appearance of your home or business, one often overlooked aspect is window cleaning. Windows play a crucial role in enhancing the aesthetics of any space, allowing natural light to flood in, and providing a connection to the outside world. However, over time, they can accumulate dust, grime, and streaks that diminish their beauty. When it comes to superior window cleaning, Window Cleaning Cypress is your trusted choice for impeccable service and crystal-clear results. In this article, we will explore the art of window cleaning, uncovering the secrets to achieving sparkling, crystal-clear windows that will breathe new life into your surroundings.

The Importance of Clean Windows

Clean windows offer a myriad of benefits that go beyond aesthetics. They can:

1. Boost Curb Appeal

Clean, gleaming windows significantly enhance the overall curb appeal of your home or business. They make a positive impression on visitors and passersby, creating an inviting and welcoming atmosphere.

2. Improve Natural Lighting

Dirty windows obstruct the entry of natural light, making your interior spaces feel darker and gloomier. Clean windows maximize the amount of sunlight that enters, reducing the need for artificial lighting and positively affecting your mood.

3. Enhance Energy Efficiency

Well-maintained windows with no build-up of dirt and grime are more energy-efficient. They help in retaining indoor heat during winter and prevent excessive heat gain in the summer, leading to potential energy savings.

The importance of hiring a professional window cleaner | Checkatrade Blog

The Art of Window Cleaning

Achieving spotless, streak-free windows is indeed an art, and it requires the right techniques and tools. Here’s a step-by-step guide to mastering the art of window cleaning:

1. Gather Your Supplies

Before you begin, make sure you have all the necessary supplies on hand. These include:

  • Window cleaner solution (or a DIY solution of water and vinegar)
  • Squeegee
  • Microfiber cloth or paper towels
  • Bucket
  • Scraper (for stubborn stains)
  • Extension pole (for high windows)

2. Remove Dust and Debris

Start by dusting off the window frame and sill using a brush or a vacuum cleaner. Removing loose dirt and debris before applying any cleaning solution will prevent it from turning into mud.

3. Apply the Cleaning Solution

Spray the window generously with your chosen cleaning solution. Ensure that it covers the entire surface of the glass.

4. Use the Squeegee

Starting from the top, run the squeegee down the window in a straight, vertical motion. Wipe the blade with a clean cloth after each pass to avoid streaks.

5. Dry and Polish

Once you’ve squeegeed the entire window, use a microfiber cloth or paper towel to dry and polish the glass. This step is essential for achieving a crystal-clear finish.

6. Address Stubborn Stains

For stubborn stains or stuck-on residue, use a scraper with a gentle touch to avoid scratching the glass. Repeat the cleaning process if needed.

Conclusion

In conclusion, experiencing the art of window cleaning can transform the look and feel of your space. Clean windows not only enhance aesthetics but also offer practical benefits such as improved natural lighting and energy efficiency. By following the step-by-step guide provided, you can easily achieve spotless, streak-free windows that elevate the beauty of your surroundings.

’80s Slang: Words and Phrases of the Decade


slang

Some 80s Slang Words and Phrases have a visceral feel that makes them just as satisfying today as they did in the ’80s. “Grody” is a perfect example of this.

Other examples include “amped up,” which can be used to describe your excitement for a Blondie concert or your anticipation of this weekend’s Miami Vice premiere. Gnarly is another that came from surf culture but has become more versatile over time.

1980

Sick

During the 80s, there was a lot of slang that made people feel super-cool and awesome. If you wanted to impress someone, you could say that their car or outfit was sick. You can still use this word today to describe something that is very cool.

Another popular word from the 80s is rad. This word means that someone is very cool and awesome, or that they are having a great time. You can also use the word to describe someone who is a rebel or who is doing things that are against the rules.

If you want to show that you are feeling uber-cool, you can use the phrase “bitchin.” This word means that something is very good or awesome. It is similar to the word gnarly, which is used to describe something that is rough or dangerous. This term comes from surf culture and has become more versatile over time.

Radical

During the 80s, radical didn’t describe someone with extreme political ideologies but instead meant cool and awesome. It was a term that grew in popularity from surf culture, then into the argot of San Fernando Valley girls (who were often called valley girls), and finally into mainstream youth culture. It’s a word that is still used today.

Another rad word of the era was “What’s your damage?” It was a way to call someone out on a crazy comment, thought, or action. Another 80s slang phrase that’s made a comeback was “zeek.” This was an adjective that referred to someone who was a bit of a geek but also had some sex appeal.

If you’re looking to impress your friends, try out these blast-from-the-past phrases that have a new meaning. They’ll surely be rad to hear.

Book

The ’80s were full of words and phrases that have become synonymous with the decade. Some, like rad, have made their way into modern-day vocabulary. Others have remained a little more tucked away, but still hold a special place in our hearts.

Something that is cheesy, corny, or in poor taste. It can also be used to describe someone who is trying too hard.

A girl who hangs out at the mall. They are known for having tons of mouse or gel in their hair, a lot of makeup on their faces, and wearing loud colors.

An emphasizing word, a bit like Def or hella. It can also be a filler phrase that’s commonly used by Valley Girls. It is usually followed by a question, such as: “Duh.”

Wicked

The 80s were a time of change and growth. The decade brought with it new trends, ideas, and expressions that were adopted by the youth culture at the time. Pop culture idols like Michael Jackson and Madonna helped to popularize many of these expressions and make them a part of the everyday language.

There are a lot of different meanings to the word wicked. Usually, it means really good or awesome. However, it can also be used as a way to express displeasure or anger. You could say that someone is a total fuckin’ wicked if you are upset with them in some way.

Conclusion

’80s slang words and phrases continue to have a special place in our hearts and language. They evoke memories of a vibrant and dynamic decade that brought about significant cultural changes. Some of these expressions have seamlessly transitioned into contemporary vocabulary, while others remain hidden gems of nostalgia.

Treasures in the Trash: The Unexpected Finds of House Clearance


House clearance is often associated with the mundane task of decluttering and disposing of unwanted belongings. However, beneath the layers of dust and discarded items lie stories of unexpected treasures and forgotten history waiting to be unearthed. Exploring the world of House Clearance often unveils unexpected treasures hidden among the trash. In this article, we delve into the world of house clearance and explore the remarkable discoveries that have left many in awe.

The Hidden Gems

Antiques and Collectibles

One man’s trash is another man’s treasure, and this couldn’t be truer when it comes to antiques and collectibles. House clearances have yielded valuable items such as vintage furniture, rare books, and antique jewelry, often tucked away in attics and basements, waiting for their moment to shine. These discoveries not only hold monetary value but also provide a glimpse into the past.

What does a House Clearance Include? - Surrey Best Cleaners

Lost Artwork

Art lovers and collectors have been astonished to find forgotten paintings, sculptures, and other artworks during house clearances. Some of these artworks have turned out to be the creations of talented but overlooked artists, adding a layer of historical and artistic significance to the findings.

Historical Documents

Old letters, diaries, and documents are like time capsules, offering insights into the lives and experiences of past generations. House clearance professionals have stumbled upon letters written during significant historical events, shedding new light on the personal narratives intertwined with these moments in time.

The Thrill of Discovery

Unexpected Valuables

It’s not uncommon for house clearance teams to discover valuable items like rare coins, vintage toys, or even hidden safes filled with jewelry and cash. These finds can be life-changing for both the homeowners and the clearance professionals involved.

Eccentric Collections

Some homeowners have unique and eccentric collections that astonish those tasked with clearing the property. From a room filled with vintage typewriters to shelves stacked with antique teapots, these collections often reveal a passion for collecting that even the homeowners’ families were unaware of.

Uncovering History

Architectural Relics

Older homes often hold architectural relics that speak to a different era of design and craftsmanship. House clearance can unveil intricate moldings, stained glass windows, or vintage fixtures that can be salvaged and repurposed, preserving a piece of architectural history.

Family Mysteries

In some cases, house clearance has led to the resolution of family mysteries. Discovering hidden letters, photographs, or heirlooms can reconnect family members with their history and ancestry, providing a sense of closure and identity.

The Responsible Approach to House Clearance

While house clearance may unearth unexpected treasures, it’s essential to approach this task with respect for the property and its history. Here are some guidelines to consider:

Preservation of Items

Before disposing of items, consider donating or selling them to ensure that valuable pieces find new homes and appreciation.

Historical Documentation

If you come across historical documents or artifacts, consult with local historians or museums to determine their significance and potential preservation.

Family Involvement

Whenever possible, involve the family in the clearance process to ensure that sentimental items are not unintentionally discarded.

Conclusion

House clearance is more than just removing unwanted belongings; it’s a journey into the past, filled with surprises and discoveries. The next time you embark on a clearance project, take a moment to appreciate the hidden treasures waiting to be uncovered. After all, you never know what valuable and historically significant items may be hiding in the most unexpected places.

From Listing to Closing: Your Ultimate Guide to Successful Home Selling


From Listing to Closing: Your Ultimate Guide to Successful Home Selling

“From Listing to Closing: Your Ultimate Guide to Successful Home Selling” sounds like a great resource for homeowners who are looking for a step-by-step guide to navigate the entire process of selling their homes. Here’s an outline of what such a comprehensive guide might cover:

Understanding the Selling Process:

Overview:Highlighting how to sell my house fast Las Vegas key stages from listing to closing.

Benefits of Preparation: Emphasize the importance of thorough preparation to achieve a successful sale.

Preparing Your Home for Sale:

Home Assessment: Evaluate the condition of your property and determine necessary repairs or improvements.

Staging Tips: Provide practical advice on decluttering, arranging furniture, and enhancing curb appeal.

Professional Help: Discuss the option of hiring professionals like stagers, photographers, and contractors.

Setting the Right Price:

Market Research: Explain how to research comparable properties to arrive at a competitive and realistic listing price.

Pricing Strategies: Discuss pricing slightly above, at, or below market value and the implications of each choice.

Effective Marketing Strategies:

Creating a Listing: Guide homeowners in crafting an appealing property listing with high-quality photos and compelling descriptions.

Online Presence: Explain the importance of listing on multiple real estate websites and utilizing social media for broader exposure.

Print Materials: Discuss the value of printed materials like brochures and flyers for open houses.

Navigating Negotiations:

Offers and Counteroffers: Detail the process of reviewing offers, making counteroffers, and negotiating terms with potential buyers.

Buyer’s Inspections: Prepare homeowners for buyer-requested inspections and the negotiation of repairs or concessions.

Accepting an Offer and Moving Forward:

Acceptance Process: Explain the steps after accepting an offer, including drafting and signing a purchase agreement.

Escrow and Earnest Money: Clarify the role of escrow accounts and earnest money deposits in securing the sale.

Managing the Closing Process:

Title Search and Insurance: Outline the importance of a clear title and the necessity of title insurance.

Closing Costs: Provide an overview of potential closing costs for both the seller and the buyer.

Final Walkthrough: Highlight the significance of the buyer’s final walkthrough before closing.

Completing the Sale:

Closing Documents: Explain the documents involved in the closing process, such as the settlement statement and the deed.

Transferring Ownership: Describe how ownership is officially transferred to the buyer upon successful closing.

After the Sale:

Moving Out: Offer guidance on planning and executing a smooth move-out process.

Change of Address: Provide a checklist of entities to notify about the change of address.

Reflecting on the Experience: Encourage homeowners to reflect on the process and learn from the experience.

Resources and Expert Advice:

Real Estate Professionals: Highlight the roles of real estate agents, attorneys, and other professionals throughout the process.

FAQs: Address common questions and concerns that homeowners might have during the selling process.

Remember that the real estate market can vary significantly by location and market conditions, so it’s important to tailor the advice and strategies in the guide to the specific context in which it will be used. Providing practical tips, examples, and real-life scenarios can make the guide even more valuable to homeowners looking to sell their properties successfully.

Unveiling Access Control: The Power of Entry Security Systems


Unveiling Access Control: The Power of Entry Security Systems

“Unveiling Access Control: The Power of Entry Security Systems” is a detailed exploration of the capabilities, benefits, and technologies that underpin access control systems. This guide offers readers a comprehensive understanding of how access control systems work, their applications, and their significance in safeguarding various environments.

The guide commences with an introduction to access control systems such as EYEON SECURITY, outlining their role in regulating entry to physical spaces. It emphasizes their importance in enhancing security, convenience, and efficiency for a variety of settings.

Understanding Access Control: This section provides a comprehensive overview of access control, defining its core components and principles. It covers the concept of granting or denying access to individuals based on authentication and authorization processes.

Types of Access Control: The guide delves into the different types of access control systems, including physical access control (doors, gates, turnstiles), logical access control (computers, networks), and biometric access control (fingerprint, facial recognition). It explains how these systems cater to diverse security needs.

Components of Access Control Systems: Readers gain insights into the essential components of access control systems. The guide explains access control cards, key fobs, readers, locks, and the central management software that orchestrates the entire system.

Access Control Authentication Methods: This section explores various methods used to authenticate individuals in access control systems. It discusses PIN codes, keycards, biometric scans, and two-factor authentication, emphasizing the importance of multi-layered security.

Benefits of Access Control Systems: The guide outlines the numerous benefits of implementing access control systems. It discusses improved security, reduced risk of unauthorized access, enhanced tracking and monitoring capabilities, and increased convenience for authorized personnel.

Integration with Other Systems: Readers learn about the integration potential of access control systems. The guide covers how access control can be seamlessly integrated with video surveillance, alarm systems, and building management systems for a more comprehensive security approach.

Access Control Use Cases: This section provides real-world use cases of access control systems across different industries. It showcases how these systems are employed in commercial buildings, healthcare facilities, educational institutions, government offices, and more.

Scalability and Flexibility: The guide addresses the scalability and flexibility of access control systems. It discusses how systems can be designed to accommodate varying numbers of users and adapt to changing security requirements.

Remote Access and Mobile Integration: This section highlights how modern access control systems offer remote access capabilities. It covers mobile apps that allow authorized users to control access remotely, granting temporary permissions and receiving notifications.

Data Security and Privacy: The guide emphasizes the importance of data security and privacy in access control systems. It discusses encryption, secure authentication protocols, and the responsible handling of personal information.

Maintenance and Updates: Readers gain insights into maintaining and updating access control systems. The guide covers routine maintenance, troubleshooting, and the importance of keeping software and firmware up to date.

Considerations for Implementation: This section offers practical considerations for businesses and organizations planning to implement access control systems. It discusses budgeting, selecting the right system, vendor evaluation, and employee training.

Future Trends in Access Control: The guide concludes by discussing emerging trends in access control technology. It touches on advancements in biometric recognition, cloud-based access control, and the integration of access control with Internet of Things (IoT) devices.

“Unveiling Access Control: The Power of Entry Security Systems” serves as an educational resource for individuals and organizations seeking to understand, implement, and harness the capabilities of access control systems to enhance security and streamline operations.

Movers’ Guidebook: Navigating the Path to a New Home


Movers’ Guidebook: Navigating the Path to a New Home

The “Movers’ Guidebook: Navigating the Path to a New Home” suggests a comprehensive resource provided by moving companies to assist individuals and families in successfully transitioning to a new residence. This concept implies that the guidebook offers a roadmap and valuable information to make the moving process smoother and less daunting. Let’s explore the components of this local movers idea:

  1. Movers’ Guidebook: This term refers to a detailed and informative document provided by moving companies. It is intended to guide individuals through the various stages of the moving process, offering advice, tips, and instructions.
  2. Navigating the Path: “Navigating” emphasizes the idea of maneuvering through a potentially complex journey, implying that the guidebook serves as a reliable source of direction and support.
  3. New Home: This phrase signifies the ultimate destination of the move, highlighting that the guidebook’s purpose is to help individuals settle comfortably into their new living space.

In practical terms, the “Movers’ Guidebook: Navigating the Path to a New Home” might include the following sections and topics:

  • Preparation Phase:
    • Checklist for preparing for the move.
    • Tips for decluttering and organizing belongings.
    • Guide to packing efficiently and safely.
    • Suggestions for labeling boxes and creating an inventory.
  • Moving Day:
    • Timeline for moving day activities.
    • Tips for working with movers and supervising the loading process.
    • Advice for ensuring the safety of valuable and fragile items.
  • Transit and Arrival:
    • Information about tracking the moving truck’s progress.
    • Suggestions for maintaining communication with the moving company.
    • Steps to take upon arrival at the new home.
  • Unpacking and Settling In:
    • Strategies for unpacking and arranging items systematically.
    • Tips for making the new space feel like home quickly.
    • Guidance on addressing any challenges that arise during unpacking.
  • Emotional and Practical Considerations:
    • Coping strategies for dealing with the emotional aspects of moving.
    • Suggestions for helping children or pets adjust to the new environment.
    • Advice on updating personal information and utilities.
  • Post-Move Follow-Up:
    • Information on how to provide feedback about the moving experience.
    • Contact details for any customer support inquiries.
  • Additional Resources:
    • Recommendations for local services, such as utilities, schools, and medical facilities.
    • Information about the community and nearby amenities.

The “Movers’ Guidebook: Navigating the Path to a New Home” concept reflects the idea that moving companies not only provide physical assistance but also valuable knowledge to help individuals and families manage the intricacies of moving. By offering a comprehensive guidebook, moving companies demonstrate a commitment to their customers’ well-being and a desire to make the moving experience as smooth and stress-free as possible.

the Art of Using a Floor Scraper


Floor scrapers are indispensable tools for removing old flooring materials, adhesive residues, and stubborn debris from various surfaces. Whether you’re renovating your home, preparing a surface for new flooring installation, or tackling a commercial project, knowing how to effectively use a floor scraper is key to achieving professional results. In this guide, we’ll walk you through the step-by-step process of using a floor scraper like a seasoned pro.

Step 1: Choose the Right Floor Scraper

Before you begin, ensure you have the appropriate floor scraper for the job. Floor scrapers come in various types, including handheld scrapers, long-handled scrapers, and powered scraper machines. Consider the size of the project, the type of material you’re removing, and your own comfort and preferences when selecting a floor scraper.

Step 2: Prepare the Work Area

Clear the area of any obstacles, furniture, or debris that may obstruct your movement. If working indoors, ensure proper ventilation to minimize exposure to dust and fumes. Additionally, if you’re removing flooring materials such as tiles or linoleum, protect adjacent surfaces and fixtures from potential damage.

Step 3: Wear Protective Gear

Safety should always be a top priority when using a floor scraper. Wear appropriate personal protective equipment (PPE) such as safety goggles, gloves, a dust mask, and sturdy footwear to prevent injuries from sharp debris, flying particles, and chemical exposure.

Step 4: Begin Scraping

Position yourself comfortably near the edge of the area you intend to start scraping. Hold the floor scraper firmly with both hands, maintaining a stable stance. For handheld scrapers, apply downward pressure while pushing the blade against the surface at a slight angle. For long-handled scrapers or powered scraper machines, follow the manufacturer’s instructions for operating the equipment effectively.

Step 5: Work in Sections

Divide the work area into manageable sections to facilitate thorough and efficient scraping. Start from one corner and work your way across the surface, gradually moving forward as you complete each section. Use a combination of short, controlled strokes and longer passes to effectively loosen and remove the flooring material or residue.

Step 6: Adjust Pressure as Needed

The amount of pressure applied depends on the type of material being removed and the condition of the surface underneath. Adjust the pressure accordingly to avoid damaging the substrate while ensuring efficient removal of the flooring material. Experiment with different pressure levels until you find the optimal balance between effectiveness and surface protection.

Step 7: Remove Debris

Periodically stop scraping to clear away debris and accumulated residue from the scraper blade and work area. Use a broom, vacuum cleaner, or dustpan to collect the debris and dispose of it properly. Keeping the work area clean not only enhances visibility and maneuverability but also prevents debris from interfering with the scraping process.

Step 8: Repeat and Refine

Continue scraping and refining each section until the entire area is thoroughly cleaned and prepped for the next step, whether it’s installing new flooring or applying surface treatments. Take breaks as needed to rest and rehydrate, especially during extended scraping sessions, to maintain focus and avoid fatigue. vist how to use a floor scraper

Step 9: Clean and Maintain the Scraper

After completing the scraping process, clean the scraper blade thoroughly to remove any remaining residue and prevent corrosion. Depending on the type of scraper used, you may need to disassemble and clean the components according to the manufacturer’s instructions. Proper maintenance ensures optimal performance and prolongs the lifespan of your floor scraper.

Step 10: Safety First

Once you’ve finished using the floor scraper, store it safely in a designated area away from children and unauthorized users. Always follow safety guidelines and precautions outlined in the tool’s user manual to prevent accidents and injuries.

By following these steps and practicing proper technique, you can harness the full potential of a floor scraper to achieve professional-quality results in your flooring projects. Remember to prioritize safety, take breaks when needed, and approach each scraping task with patience and precision. With dedication and attention to detail, you’ll become proficient in using a floor scraper like a seasoned expert.

Substrates in Agriculture: Cultivating Growth from the Ground Up


Substrates in Agriculture: Cultivating Growth from the Ground Up

In the world of agriculture, the choice of growing medium can significantly impact crop health and yield. Substrates, also known as growing media or soilless mediums, have become increasingly popular in modern agriculture due to their versatility, consistency, and ability to address various environmental and space constraints. In this article, we’ll explore the role of substrates in agriculture, their types, benefits, and their impact on the future of farming.

 For more information regarding hydroponic plant one can visit our site https://hydroponicglobal.com.au/.

What Are Substrates in Agriculture?

Substrates are materials used to support and nourish plant roots when growing plants in a controlled environment, such as greenhouses, hydroponic systems, or container gardening. Unlike traditional soil, substrates are often soilless and consist of a mixture of organic and/or inorganic components that provide physical support, aeration, and a suitable environment for root development.

Types of Substrates

Several types of substrates are used in agriculture, each with its unique characteristics and suitability for different growing conditions:

1. Peat-based Substrates: These are composed primarily of peat moss and are known for their high water retention capacity. Peat-based substrates are commonly used in horticulture but have raised environmental concerns due to peat extraction’s impact on peatlands.

2. Coir-based Substrates: Coir, derived from coconut husks, is an organic alternative to peat moss. Coir-based substrates are renewable, have good water retention, and are pH-neutral.

3. Vermiculite and Perlite: Vermiculite and perlite are lightweight, inorganic substrates known for their excellent aeration properties. They are often used in seed starting and container gardening.

4. Rockwool: Made from volcanic rock, rockwool is a popular choice in hydroponics. It provides excellent water and air retention and can be custom-tailored for specific crops.

5. Coco Coir: Coco coir, made from coconut fiber, is an increasingly popular substrate due to its sustainability and water retention capacity. It is often used in hydroponic and container gardening systems.

6. Hydroton (Expanded Clay Pebbles): These are lightweight, pH-neutral clay pebbles used in hydroponic and aquaponic systems. They provide good drainage and aeration.

7. Sand and Gravel: In some cases, sand and gravel can be used as substrates, particularly in large-scale outdoor farming and certain hydroponic systems. They provide excellent drainage but may lack nutrients.

Benefits of Using Substrates in Agriculture

The use of substrates in agriculture offers several benefits:

1. Precision Control: Substrates allow growers to have precise control over the growing environment, including water retention, aeration, and nutrient levels.

2. Improved Disease Management: Soilless substrates reduce the risk of soil-borne diseases and pests, leading to healthier crops.

3. Optimized Resource Use: Substrates can improve water and nutrient efficiency, reducing waste and environmental impact.

4. Versatility: Substrates are adaptable to various growing systems, from container gardening to hydroponics and vertical farming.

5. Space Efficiency: Substrates enable agriculture in constrained spaces, such as urban environments or greenhouses.

Applications of Substrates in Agriculture

Substrates find applications in a variety of agricultural practices:

1. Greenhouse Cultivation: Greenhouses often use substrates to maximize control over growing conditions and optimize crop production.

2. Container Gardening: Home gardeners and urban farmers use substrates in containers or raised beds to grow vegetables, herbs, and ornamental plants.

3. Hydroponic Systems: Hydroponic systems rely on substrates to support plant roots while delivering water and nutrients directly to them.

4. Vertical Farming: Substrates play a crucial role in vertical farming systems, enabling crops to be grown in stacked layers without soil.

5. Nursery and Seed Starting: Substrates are commonly used for seed starting in nurseries to provide young plants with optimal conditions for germination and early growth.

Challenges and Considerations

While substrates offer numerous advantages, there are some challenges and considerations:

1. Nutrient Delivery: Substrates may lack essential nutrients, necessitating the addition of fertilizers or nutrient solutions in some cases.

2. Environmental Impact: The choice of substrate materials can have environmental implications. For example, the extraction of peat moss has raised concerns about peatland preservation.

3. pH Management: Monitoring and adjusting the pH of substrates is essential to ensure optimal nutrient uptake by plants.

4. Salinity Buildup: Over time, substrates can accumulate salts, affecting plant health. Regular leaching or flushing may be required.

5. Substrate Composition: The composition and quality of substrates can vary, and growers must choose substrates that match their specific crops and growing conditions.

The Future of Substrates in Agriculture

As the global population grows, and urbanization increases, the demand for efficient and sustainable agriculture practices continues to rise. Substrates are poised to play a crucial role in addressing these challenges by enabling the cultivation of crops in diverse settings, including urban environments, arid regions, and controlled indoor facilities.

Future developments in substrate technology may focus on improving sustainability, enhancing nutrient delivery, and minimizing environmental impact. Researchers are also exploring new materials and innovative designs for substrates to further optimize crop growth and resource efficiency.

In conclusion, substrates have become integral to modern agriculture, offering a versatile and sustainable alternative to traditional soil-based farming. As we navigate the complex challenges of feeding a growing global population while preserving our environment, substrates stand as a testament to human ingenuity in cultivating crops from the ground up, with an eye toward a more sustainable and food-secure future.